Explorer Windows

Accelerus Icon
 

Explorer windows are available for most entity types in Accelerus, through which, in addition to Quick Find, records may be searched and opened.

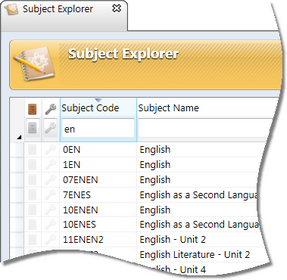
The Explorer windows contain a table in which the records belonging to that entity are displayed. For example, the Subject Explorer only displays current subject records.

All of the Explorer windows are opened through the Explore menu, with some of the most commonly-used ones also having icons in the toolbar.

UI ExplorerIcons

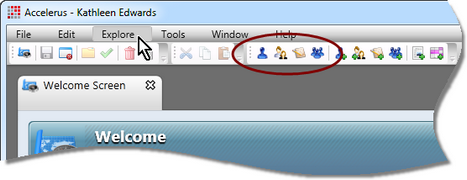
Both the Quick Find and Explorer windows allow you to search for and open a tabbed window for a record. However, Explorer windows are much more powerful and flexible than Quick Find.


Although each Explorer reflects the fields, and may contain processes, that are applicable only to the particular type of entity, the features of the Explorers are consistent across all types of entities.

UI ExplorerNumbers


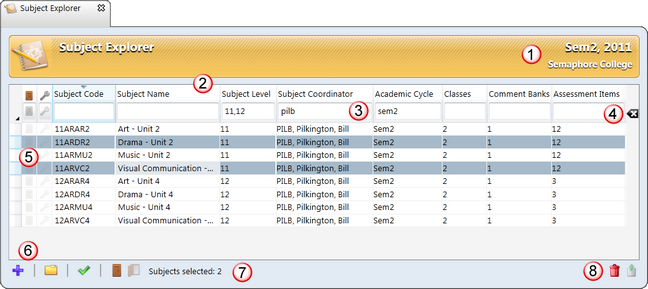
Common features found in all Explorers are outlined below:


#

Feature

1

Explorers always open in the currently select academic cycles and the records they reflect are those that are applicable to those cycles, as listed in the top right corner.

2

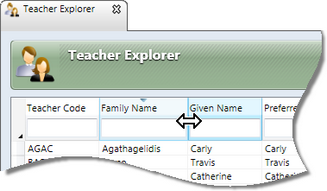
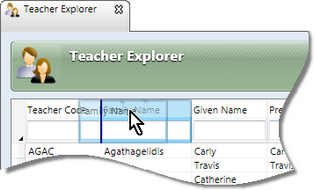
A column for each field of the particular record is available, with the field name being displayed.

Several column processes are available to users including sorting records by a particular field, moving, hiding and displaying columns.

3

Each column heading has its own search field in which search criteria may be entered, in order to find particular records, optionally using wildcards.

In some cases, in fields found at the beginning of the Explorer's records table, the search field is a dropdown list, containing options, eg to find subjects which are or are not closed or all subjects, in the Subject Explorer.

4

The Reset search icon removes all search criteria and redisplays all records.

5

The records displayed in the table are those that meet the search criteria entered or selected in the search fields.

Individual, multiple or all records may be selected and opened, or other procedures performed on them, as applicable to the type of record.
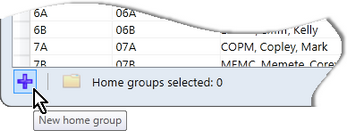
6

Each Explorer has a toolbar below the table of records which contains icons that allow appropriate processes to be performed on the selected records. For example, as shown above, in the Subject Explorer, apart from the standard Add, Open details and Open results icons, the next two icons allow subjects to be closed or made available.

7

All of the Explorers allow multiple records to be selected at the one time. The number of records currently selected is displayed in the Explorer's toolbar.

8

The deletion of records in Accelerus is done via the Explorer windows, using the Delete icon.

Individual or multiple records that have already been selected will be marked for deletion when you click the Delete icon, ie they will appear with a red line through them. The Explorer needs to be saved to permanently delete the marked records.

Where records have been marked for deletion, you may reinstate them by clicking the Reinstate icon. However, they may not be reinstated after the Explorer window has been saved.


Apart from standard procedures for searching, including the use of wildcards, selecting and opening records that are found throughout Accelerus, the following are the additional features of the Explorer windows that make them much more powerful tools.


minusCustomising the Explorer columns

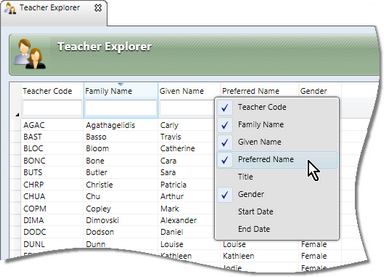
Each Explorer window has a column for each data field applicable to the type of entity. When you first use Accelerus, a default set of columns appears for each entity type, the order and width of which are set by default.

However, these columns may be customised for each Explorer and these customised settings will be retained for each user. Therefore, it is recommended that you set the Explorer columns as required when you first use Accelerus, to speed up the process of finding and opening different records, and to maximize screen space.


To change the width of a column:

Move your mouse pointer to the right-hand border of the column you want to change.
Holding down the left mouse button, drag the border in or out until it is the width required.
Then, release the mouse button.

UI ExplorerResizeColumn


When you first open an Explorer, its columns will be in a set order. However, you may change the order of the columns so that the particular Explorer always shows them in the selected order.

All columns may be moved as follows:

Click on the heading name of the column you want to move and hold down the left mouse button.
Drag the column heading to the position in which you want the column.

As the column moves a dark vertical lines appears in the location that the column is moving over.

Release the mouse button to reposition it in the required location.

UI ExplorerMoveColumn


Lightbulb

The order in which the columns are displayed has a bearing on the order in which the records are sorted when you reopen a particular Explorer. The first column displayed in an Explorer, with the exception of the special fields found in some Explorers that allow selection via dropdown lists, determines the order in which the records will be sorted when you open the Explorer. Therefore, for example, in the Student and Teacher Explorers you may want to move the family name column to the first column position so that the students and teachers are always sorted alphabetically based on their family name.


When you first open a particular Explorer, a default set of columns will be visible. These are usually not the only columns available and you may choose the set of columns you want to display or hide.

For example, if your school never uses the teacher title field, you could hide this. At other times, you may want to temporarily display a field that you do not usually require, such as the field for a subject's description.

All available fields may be hidden, including the special dropdown fields at the beginning of some Explorers. For example, the System column found in the Subject, Class and Assessment Item Explorers are only applicable to schools in the Victorian Catholic and State sectors. All other schools may choose to hide this column.

Reveal or hide columns as follows:

Right click anywhere in the Explorer heading row - where the names of the columns appear, not in the search fields.
In the menu that appears showing all available fields:
Select a ticked field to toggle off the tick and remove the column from view in the Explorer.
Where a column is hidden and, therefore, not checked, select it to reveal that column in the Explorer.

UI ExplorerSelectFields


minusSorting records in the Explorer window

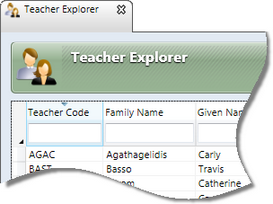
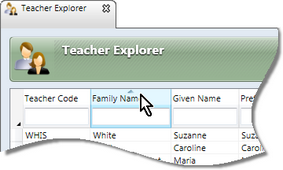
The records displayed in the Explorer windows can be sorted to make finding and selecting particular records easier. For example, all of the displayed teachers may be sorted into alphabetical order based on their code, family name, given name, etc.

The data may be sorted into ascending or descending order. However, the sorting of records is not always strictly alphabetical as Accelerus takes into account that school data usually includes numbers that have a specific meaning, eg year and subject levels.


There are two special aspects to sorting in Accelerus:

When you open an Explorer, the first column displayed, with the exception of the special dropdown columns found in some Explorers, determines the order in which the records will be sorted. Usually the first column is the record code.

As shown here, the teachers are sorted into ascending order based on their teacher code.

UI ExplorerSortAsc

However you may want to move columns so that another column is first. For example, in the Student and Teacher Explorers you may want to move the family name column to the first column position so that the students and teachers are always sorted alphabetically based on their family name.

The records sort in alphanumerical order generally, but in three circumstances Accelerus sorts the data in a special way:
Subject levels sort in accordance with the order that the levels appear in the Subject Levels tab of the School Settings window.
Where combinations of numbers and letters are used that may indicate year or subject levels, eg 07ENG, MAT10, these records are sorted in a specific manner, so that the records appear in a logical sequence, rather than a strict alphanumeric one.

As shown below, the codes starting 07 and 7 have both between treated as if they were 7, and 07EN does not appear after 0EN as it would in an alphanumeric sort. Also, the codes beginning 0, 1, 10 and 11 have been treated as numbers and not as they would in an alphanumeric sort in which case they would appear in the following order: 0EN, 10EN, 11EN, 1EN.

UI ExplorerSortSpecial

Results in list type marking schemes always sort in the order in which the marking scheme values have been set up. Therefore, when teachers are working in a class or subject results windows, when they sort their students on the basis of their grades in any columns using list schemes, they will appear from highest to lowest, or vice versa, and not in alphabetical order.

For example, where the scheme below has been set up, the students will sort in A, U, S, R, N order and not A, N, R, S, U.

UI ExplorerSortMarks


To sort the records in an Explorer:

Click the column heading you wish the list to be sorted by.
Where the sort is in ascending order, click again to change to descending order, and vice versa.

UI ExplorerSortDesc

Lightbulb

The column by which the table is sorted always appears shaded and an arrowhead above the field name indicates whether the sort is ascending or descending, ie if pointing down or up respectively.


minusDropdown search criteria in Explorers

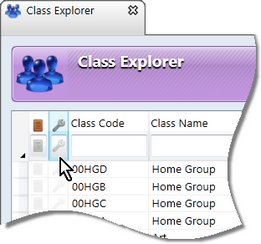
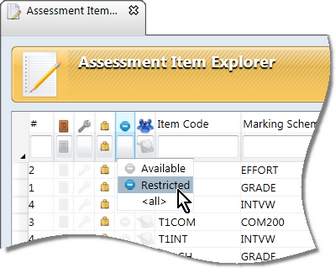
The Explorer windows allow search criteria to be inserted in one or multiple fields to hone in on particular records that you wish to find.

The standard procedures for entering search criteria, including the use of wildcards, apply to all Explorers, as they do to Quick Find.

However, some Explorers have special columns in which search criteria are selected from dropdown boxes, and wildcard characters are not allowed.

These fields have a default selection so that, for example, when you open the Subject Explorer, subjects that have been closed do not appear. You must choose to display such closed subjects from the options available in the Closed dropdown column.

The default selection is apparent from looking at the Explorer. As seen below, grey symbols appear in the Closed and System columns, indicating that such classes have been excluded from the table of records.

UI ExplorerSearchDropdownDefault


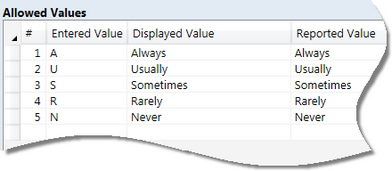
The following table details the available special columns, their usage and default selections:


Special columns

Explorer found in

Usage

Default selection

Closed status

Subject Explorer

Class Explorer

Assessment Item Explorer

Whether the subjects and, by default, their classes and assessment items, have been closed or are available for editing, etc.

Open subjects only.

System status

Subject Explorer

Class Explorer

Assessment Item Explorer

Only applicable to schools in the Victorian Catholic and State sectors where special system subjects are created by Accelerus for the production of AusVELS reports.

Non-system subjects only.

Locked status

Assessment Item Explorer

Whether the assessment item has been locked so that teachers cannot change the results that have been entered.

All assessment items, whether locked or unlocked.

Restricted status

Assessment Item Explorer

Whether the assessment item has been restricted from the view of teachers totally.

All assessment items, whether restricted or available to teachers.

Subject or class assessment item

Assessment Item Explorer

Whether assessment items created by teachers for their own use in their classes are displayed or only those created in the database for subjects.

Subject assessment items only.


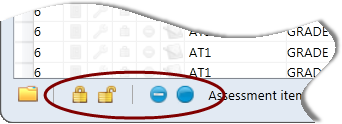
To make a selection in the special columns:

Click the selection field for the particular column required and a dropdown box will appear, with the available options.
Click the option required, eg Available, Restricted or <all> in the Restricted status column.
Wait a moment or press Enter to display just the records that comply with your selection, eg just restricted assessment items.

The column selected will contain an appropriate symbol, when applicable. For example, as seen below, only locked assessment items have been selected for display and, therefore, a lock symbol appears for each assessment item.

UI ExplorerSearchDropdowns


minusOther processes from Explorers

The Explorers in Accelerus are not just for searching and opening records. Other processes available from all or selected Explorers include:

The deletion of records, individually or in bulk, available from all Explorers.

In the bottom right-hand corner of each Explorer is a Delete icon and a Reinstate icon.

In most Explorers, new records may be added by clicking the Explorer's New icon.

UI ExplorerAddIcon

In the Assessment Item Explorer, you may:
Lock and unlock assessment items so that the results therein cannot be altered by teachers.
Restrict assessment items from the view of teachers, or make restricted items available.

UI ExplorerLockRestrictIcons

The closing of subjects via the Subject Explorer.
The importing of comment banks via the Comment Bank Explorer.
In the Result Conflict Explorer, an Export CSV file icon is available so that results that are selected in the Explorer may be retained and, if required, reimported into Accelerus.
The importing and exporting of analyses from the Analysis Explorer.