Apart from the general user interface principles that apply across Accelerus in relation to data entry, including those pertaining to entering and saving data, the following entity processes apply.
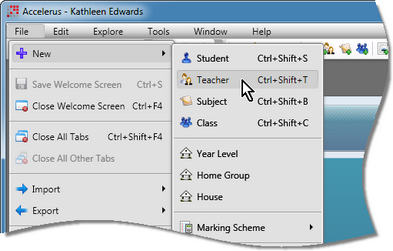
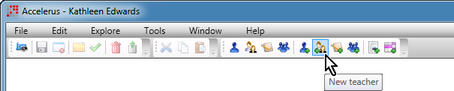
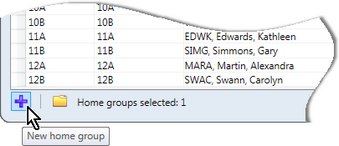
When adding new data, eg a new teacher or subject, there is a logical sequence that needs to be followed. Firstly, teachers must be added to the database before subjects can be added. Likewise, classes can only be added once subjects have been set up, and so forth. Generally, the bulk of the data used in Accelerus is imported from the school's administration or timetable system. However, from time to time, manual entry of a new student or teacher, a missed subject, class, etc, may need to be undertaken. Some types of entities may not be imported at all; new records must be added manually, eg report runs. When adding records, a similar process is followed for the main data types, whether a teacher, class or cohort group, even though the data fields vary for each type of record. The general steps for adding a new record are:
OR
OR
OR
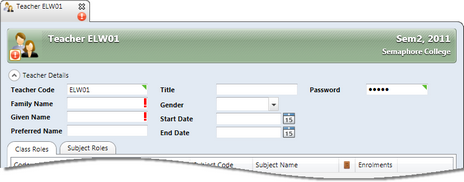
Note that the mandatory fields will have a red exclamation mark until valid data is entered into them.
|
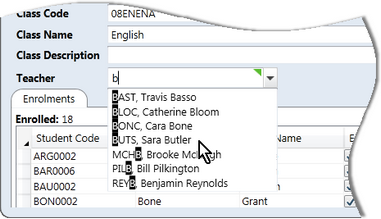
When adding new records or making changes to existing ones, you will come to fields in which the data that must be entered must already exist in another record. For example, when adding a new student, you must assign the student to the appropriate cohort groups, eg their year level and home group. These groups must already exist, whether added manually or imported. In these cases, the field will display a dropdown selection box from which you select the linked record. To select the linked record, you may:
OR
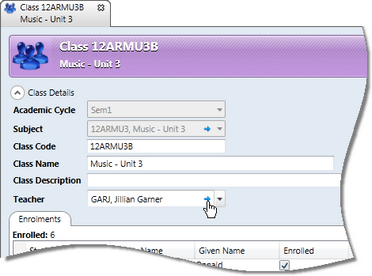
Thereafter, when you reopen the record, the field that was linked to another record will display a blue arrow link. For example, as shown below, clicking the blue arrow in the Teacher field of this class record will take you to the record of the teacher Jillian Garner.
|
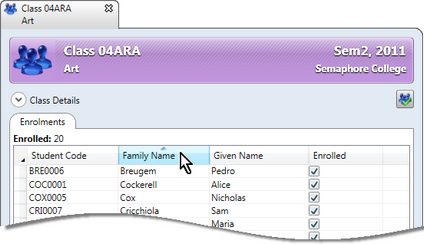
Most of the entity windows contain tables of data, eg a student's record has a table of classes into which the student is enrolled; a cohort record displays its members in a table, and so on. When the table in an entity window is not able to be directly edited, the records in the table may be sorted by any of the available column headings:
The column by which the table is sorted always appears shaded and an arrowhead above the field name indicates whether the sort is ascending or descending, ie if pointing down or up respectively. As shown below, the students in the class are sorted in ascending alphabetical order based on their family name.
|
If a record's data needs to be changed, you need to find and open the appropriate record and modify it as follows:
OR
OR
OR
|