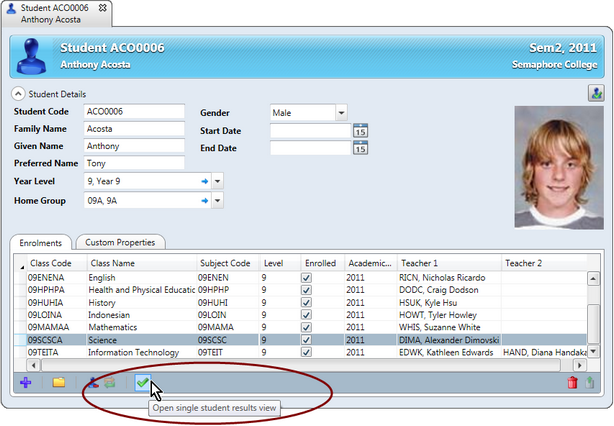
The Single Student View window is made up of several panes and allows a teacher to work on the results - both comment and non-comment - of one student at a time.
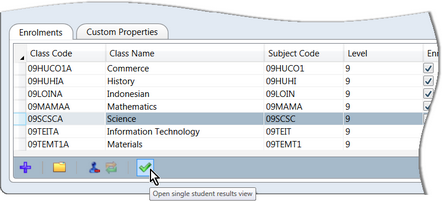
Whether opened from a subject or class results window, or from a student or class details record, the Single Student View window appears as shown below, with some minor exceptions, with the following features only available where single student view has been activated from a class or subject results window:
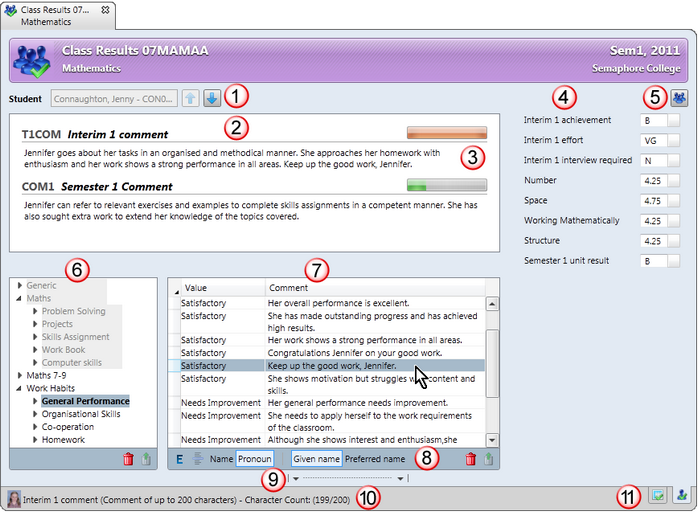
| • | Teachers may move through the students, forward to the next student and back to the previous one - see 1 below. |
| • | Teachers may bring up the details of the class or subject by clicking the Open details icon in the top right corner - see 5 below. |
| • | Teachers may move back and forwards between results grid view and single student view by clicking the tabs at the bottom right of the window - see 11 below. |
#
|
Section
|
1
|
If single student view was opened from a class or subject results window:
| • | The name of the currently displayed student is shown in the Student field. |
| • | If, in the results grid, a student's row is clicked before moving to single student view, that student will be the one selected. |
| • | You may move back and forwards through the students in the class or subject by clicking the Next and Previous student arrows at the end of the Student field, or pressing Alt N or Alt P, respectively. |
If activated from a student's record or from a class details window, the Student section is missing from single student view.
|
2
|
Comment fields appear for all comment items that are currently visible, ie selected via the View menu options. This means that teachers may work on multiple comments for the same student at the one time.
It is in these comment boxes that the students’ comments are composed, either by typing directly into the boxes and/or inserting comments from comment banks.
|
3
|
Each comment field, where a comment maximum has been set, has a gauge in its top right corner that indicates how much of the allowance has been used. The gauge turns yellow when the comment reaches 75% of its maximum character allowance and red at 90%.
Depending on a comment option set by the Accelerus administrator:
| • | Teachers may type beyond the maximum number of characters, in which case the comment field turns red and a red exclamation mark also appears to indicate the comment length is invalid. The teacher must modify the comment so that it fits within its maximum number of characters before the comment can be saved. |
| • | When the maximum is reached, teachers are not able to continue entering text. |
|
4
|
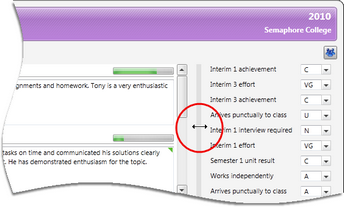
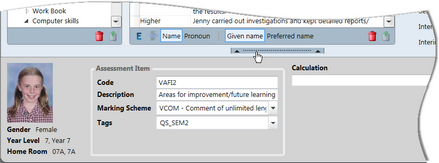
A pane to the right lists all of the non-comment assessment items currently visible so that teachers may both see these results as they compose comments and enter or modify non-comment results, if they wish.
This pane may be narrowed to allow more space for the comment panes, if you wish. Hover your mouse pointer to the left of the non-comment pane until it becomes a double-headed arrow. Hold down your mouse and drag the divider to the required width.
|
5
|
The Open details in the top right corner will be:
| • | Missing totally if single student view was entered from a student's record or for an individual student from a class details window. |
| • | An Open class details icon when working on class results, allowing class teachers to display the details of the class and go to the individual records of the students within the class. |
| • | An Open subject details icon when working on a subject's results. It allows those with subject level permissions to bring up the subject's window, displaying all of the assessment items, classes, and other tabs of data found in this window. |
|
6
|
The bottom left pane lists all of the comment banks that are available for the particular subject or class, ie both school comment banks that have been assigned to the subject by the subject coordinator or Accelerus administrator, and those created by the teacher. School comment banks are shaded grey, indicating that the teacher may not modify these. Only the comment banks owned by the teacher may be modified.
Teachers can double click a comment bank's name to display its categories, or click its arrowhead and, using the same method, display the values of a category.
|
7
|
The table of comments will change to reflect the selection made in the comment bank pane. For example, if a particular category is selected, all of the comments for that category will be displayed, together with the value to which the comment belongs.
|
8
|
A series of icons appears at the bottom of the comment table. The options appearing there will vary according to what settings have been chosen by the Accelerus administrator, and whether the teacher is in comment edit mode which allows the teacher to modify the comment banks they own. When in Edit mode, additional icons also appear at the bottom of the pane listing the comment banks.
|
9
|
A pane that may be hidden or made visible is found at the bottom of the Single Student View window. This pane displays further details about the student, including their photo if available, and about the current assessment item.
Clicking the pane divider hides or shows the bottom pane.
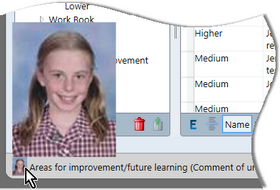
When the pane is hidden, the status bar gives essential details of the current assessment item being worked up.
Also, it contains a thumbnail of the student’s photo which may be clicked to be enlarged.
|
10
|
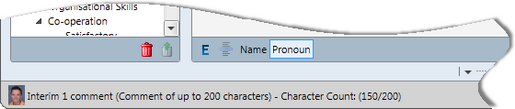
The status bar displays information about the assessment item currently selected. If this is a comment item, it also informs the user of the maximum length allowed, if set, and the number of characters used, eg 150/200. This count can also be displayed by hovering over the comment gauge of each comment.
|
11
|
When a teacher is working on a class or subject's results, they may move between results grid and single student view by clicking their respective tabs in the bottom right corner of a subject or class results window. Shortcuts of Ctrl G and Ctrl T may also be used, or these options may be chosen from the View menus.
These options are not available when entering via a student's record or via a class details window - there is no grid view for a single student.
|
|