Bulk Enrolments

Accelerus Icon
 

Apart from importing enrolment data via CSV files, or adding enrolments manually to individual classes or to individual students, a handy tool available for large numbers of enrolments is the Bulk Enrolment window.

The Bulk Enrolment window is able to be accessed via the Tools menu by those with a school role who have permission to administer enrolments.

It allows you to select multiple sets of students and enrol them in multiple sets of classes.

This window is particularly useful for primary schools, for those schools that do not have enrolment data in an electronic format, or for enrolling students into pseudo subjects, eg when students need to be enrolled into a home group subject for reporting purposes.

Ent BulkWindowNumbers


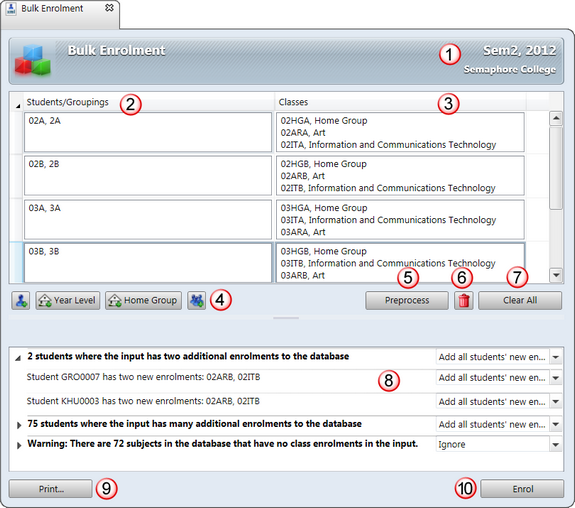
The various parts and features of the Bulk Enrolment window are as follows:


#

Feature

1

It is important that the correct academic cycles appear in the top right corner of the window, as the students will be enrolled into the classes belonging to one of the ones displayed.

Enrolment data belongs to a particular academic cycle and you may enrol students into the wrong set of classes if the wrong cycles are selected. If the wrong academic cycles are displayed, close the Bulk Enrolment window, select the correct cycles in the Academic Cycle Selector and reopen the window.

2

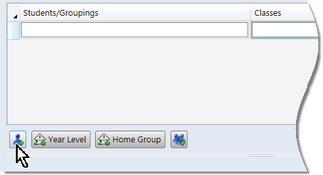
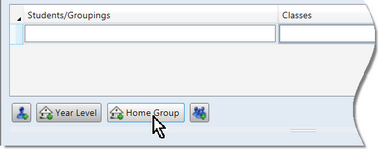
In the first column, you nominate the students to be enrolled, with each cell containing a set of students who will be enrolled into the same set of classes.

The students may be any selection of students or they may be the students who are members of a particular group, eg a home group. As shown above, each row contains a home group - 02A, 02B, etc - that is, the students belonging to the home group will be enrolled.

The students are selected by clicking the appropriate one of the buttons below the column.

3

The second column of the table is where the classes the students are to be enrolled into are added.

In the graphic above, students in 02A are being enrolled into classes 02HGA, 02ITA, 02ARA.

4

Buttons allow you to:

Select by student which brings up a student selection window
Select students on the basis of their cohort memberships. A button will appear for each cohort type that has been defined in the School Settings window, eg Year Level and Home Group. These will bring up a selection window for the appropriate cohort groups.
Select the classes into which the students are to be enrolled, bringing up a class selection window.

5

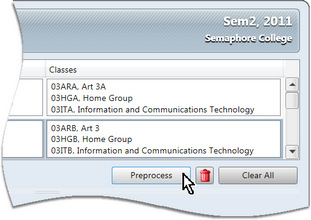
Once you have entered at least one row of student/groupings and classes, clicking the Preprocess button will run a process which compares the enrolment rows with the enrolments already in the database for the selected cycles.You are informed of the impact of the enrolment process on existing data prior to actually enrolling the students in the pane below. Issues, errors and warnings are reported back, and displayed in the pane below.

6

You may clear out:

A row in a cell, by clicking the actual record, or
The contents of a cell by highlighting the whole cell, or
A row by clicking in the selection bar to the left of the first data column,

and then clicking the Delete icon.

7

By clicking the Clear All button, all enrolment rows are cleared out and the table returns with just one row, for you to start over.

8

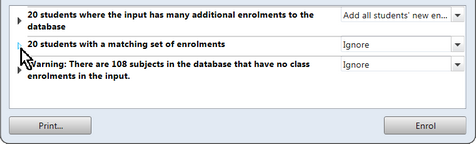
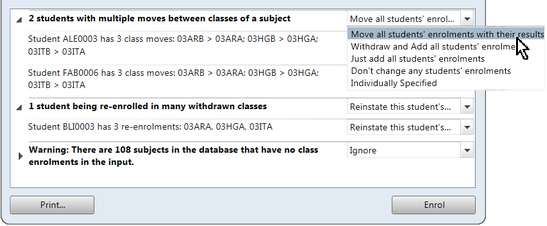
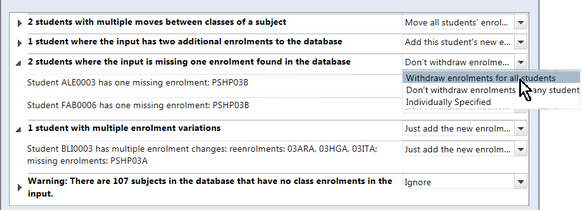
The Preprocess pane lists all of the issues, errors and warnings under broad types or headings, eg enrolments that will be added.

To begin with, only the issue headings are displayed. You may double click a heading, or click the arrowhead to its left, to display the details of the enrolments to which the issue applies. Double clicking again will hide the details.

For each issue type, there is a dropdown action box. A default action will be displayed, and alternative actions are available for selection at the header and individual record level, from the dropdown list.

9

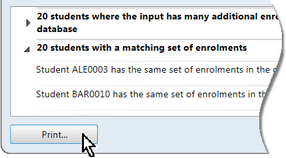
The Print button allows you to preview and print out a copy of all issues and selected details, if you need to investigate further. The printout will only include the individual details of the issue rows that are currently open. Where an issue is contracted, only the issue header will be printed.

10

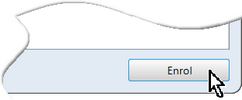
When all issues have been investigated and corrected, where necessary, clicking the Enrol button will enrol the students into the nominated classes, for all of the rows entered.


minusBulk enrolment steps

To bulk enrol students:

Take a backup of your database before you make mass changes to your database.
Go to the Tools menu and select Bulk Enrolment.
Click in the first column of the first row and proceed on the basis of the method by which you want to choose students.
If by student:
Click the student icon.

Ent BulkByStudent

In the Select students to add window, find and select the students required, using the standard selection window protocols, and click OK.

Ent BulkStudentSelect

Click OK and the student names will appear in the cell.
If by cohort group:
Click the appropriate one of the buttons that appear for the cohort types that apply at your school, eg Home Group.

Ent BulkByCohort

The window that appears will allow you to search for and choose cohort groups of the selected type, using all of the procedures available in selection windows.

Ent BulkCohortSelect

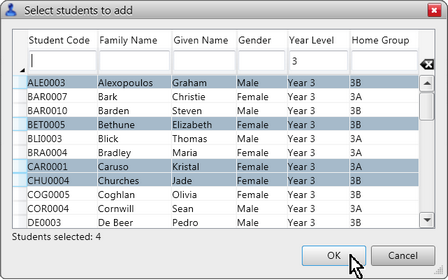
You may select multiple groups, but in most cases it will only be one.

Click OK and the cohort group's code and name will appear in the cell.
Once the students are selected in a row, whether on the basis of their group membership or individually, select the classes that the students are to be enrolled in:
Double click in the second column of the first row, making sure this row is the highlighted or active row.

OR

Click the Classes icon.
In the Select window, find the classes into which the students are to be enrolled, using standard search procedures.

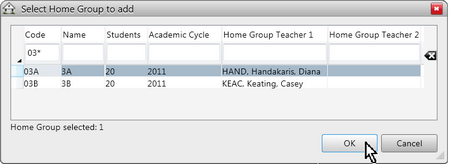
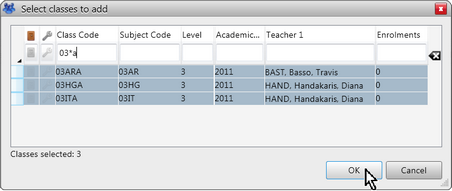
For example, as seen here, the students who are in home group 03A are being enrolled in all classes that begin with 03 and end with A, ie 03*a.

Ent BulkClassSelect


Lightbulb

Notice that the Enrolments column displays 0 for the three classes above, ie no students are currently enrolled in the classes selected. This is a handy checking mechanism when doing bulk enrolments.


Select the cohort groups, and click OK.

The Bulk Enrolment window will now have one row with selections in both columns.

Continue adding rows of combinations of students and classes, in the same manner.
Once you have done a few rows, click the Preprocess button.

Ent BulkPreprocess

In the preprocess pane:
Carefully check the issues, errors and warnings that are reported, clicking open the issue headers to check the details of the individual records.
Be particularly careful about any messages about moves, re-enrolments and withdrawals. The same enrolment issues that apply when importing enrolment CSV files apply here.

Ent BulkPreprocessPane

If you want a print out of particular issues, eg to check out or fix any anomalies or unexpected issues:
®Close any issue headers you don't need details of.
®Open the issue headers whose details you want to print.
®Click the Print button.
®From the Preview window, print the listing.

Ent BulkPrint

Where there are errors or unexpected issues, investigate these before returning to the Bulk Enrolment window and preprocessing again.
Click the Enrol button, when ready to proceed.

Ent BulkEnrol

Wait while the students are enrolled, clicking OK at the completion message.
Repeat for further sets of bulk enrolments.


minusUsing Bulk Enrolment to change enrolments

The Bulk Enrolment window can be used to not only enrol students in additional classes, but also as a means of changing existing enrolments, eg to move a student from one set of classes to another.

It works in a very similar way to the Import CSV Files window, when it comes to enrolments, and will report moves, re-enrolments and withdrawals when it encounters the following situations:

It is considered a potential move when a student is enrolled in one class of a subject already and they are being enrolled in another class of the same subject.

This has occurred in the first issue reported below, where Student ALE0003 appears to have moved class in three subjects.

Ent BulkMoveReenrol

In the case of a potential move, the actions available are that the student:

May be moved, together with any results, from one class to the other.
Is withdrawn from the class in the database and a new enrolment added for the class nominated in the Bulk Enrolment window.
Is enrolled in the new class, as well as remaining in the old.
Retains the enrolments as they are in the database, ie the new enrolment is ignored and the old enrolment remains.
Messages regarding re-enrolments appear, as shown above in the case of student BLI0003, when a student has been withdrawn from a class in the database but an enrolment for the same class has been stipulated in the Bulk Enrolment window.

In such cases there are only two available actions:

The student's enrolment is reinstated, ie the withdrawn status is removed.
The enrolment remains withdrawn, and the new ignored.
Where enrolments that are in the database for a student are not included in the Bulk Enrolment window, you may choose to withdraw the student from the classes in the database. Alternatively, the enrolments can be added, in addition to those in the database, which will occur if the Don't withdraw enrolments option is chosen.

This situation is demonstrated in the case of the two students ELE0003 and FAB0006 below.

Ent BulkWithdraw


Warning

If the enrolment variations applying to a student are multiple and complex, the preprocess phase will not list them all individually, but inform you that multiple variations exist, as is the case with the student BLI0003 above.

You may only choose one action to apply to all enrolments, the safest, in this case, being to not change the student's enrolments in the database while you investigate further or manually make the changes.