In many locations throughout Accelerus you may preview and print out listings, including in the Preprocess pane when importing CSV files, rolling over data, changing entity codes, etc.
The Print Preview window is the same in each case and it not only allows you to view the listing on screen, but to print selected or all pages and export the listing.
The toolbar at the top of the Print Preview window contains a wide range of tools that activate the many features of the window.
The Print Preview window has many features that facilitate the previewing, printing and exporting of listings.

#
|
Feature
|
1
|
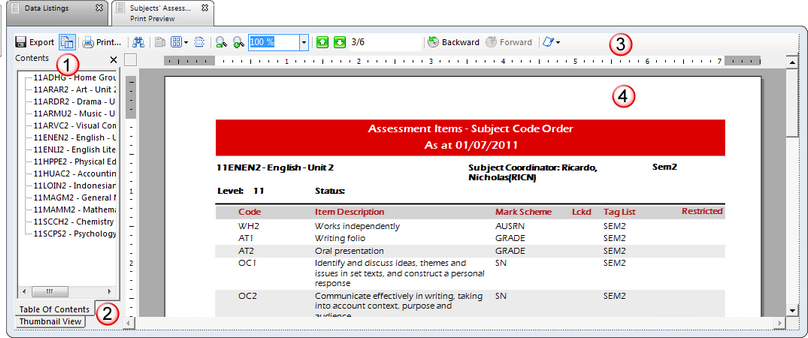
The Table of Contents groups the records found in the listing. In some cases, these groups may be opened further to reveal sub-groupings or records.
Click the required record or group to be taken directly to its page in the listing. You may hide the Table of Contents by clicking its icon in the toolbar.
|
2
|
You may toggle between Table of Contents and Thumbnail view, the latter allowing you to see and scroll through thumbnails versions of the pages of the report. Clicking on a page's thumbnail takes you directly to that page of the report.
|
3
|
The Preview window's toolbar contains a wide range of icons allowing you to control the look of the listing in the preview window, as well as to print or export the listing to a file.
|
4
|
The listing is shown in the Print Preview window. Most of the icons in the toolbar control the look of the listing in the window, eg you may zoom in or out, to see more or less of the listing, control how many pages are shown at once, etc.
|
|
The toolbar in the Print Preview window contains a wide range of features.

#
|
Feature
|
1
|
The Export icon allows you to export the listing to a PDF document, an Excel worksheet or a CSV file. When you select this icon, choose the file format from the Save as type field in the Export window.

|
2
|
The Table of Contents icon allows you to show or hide the table of contents and thumbnails pane in the Preview window.
|
3
|
Clicking the Print icon brings up a Print box from which you choose the printer, number of copies, and other printer preferences.
|
4
|
You may search for text in the listing by clicking the Find icon. The Find window contains options to match the case and whole word, and to search up or down.
|
5
|
Click the Single Page View icon to display the listing in the Print Preview window one page at a time.
|
6
|
Click the dropdown arrow for the Multiple Page View icon to display from 1 up to 6 pages of the listing at a time. Highlight the number of pages and their configuration, eg 2 pages across or under each other.
|
7
|
Click the Continuous Scroll icon to scroll through the pages of the listing continually, rather than at a single page or multiple pages at a time.
|
8
|
Click the Zoom In and Zoom Out icons to see more details or to preview the overall look of the listing, as required, with each click displaying less or more of the listing, as appropriate.
|
9
|
Select the required zoom size of the Print Preview window by clicking the Zoom Value icon's dropdown list. You may select from preset percentages, page width and whole page view.
|
10
|
You may move through the pages of the listing by clicking Previous Page and Next Page icons.
|
11
|
The Page Index box displays the current page's number and the total pages, eg 1/2. Enter a page number to move directly to that page.
|
12
|
The Backward and Forward icons allow you to go through previously viewed pages, in the same way as you would use Back and Forward in a web browser.
|
13
|
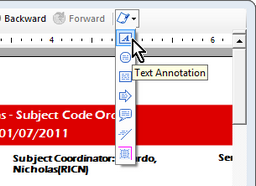
To use annotations in the listing:
| • | Click the Annotations dropdown list, selecting the type of annotation you wish to add. |

| • | Drag the annotation to the location required, and release. |
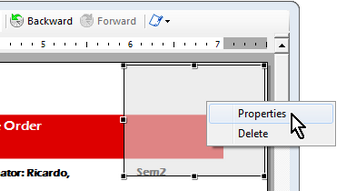
| • | You may change the properties of an annotation, including adding text to it, by right clicking and selecting Properties. |

|
|


