Not only may you import data into Accelerus, it may also be exported out, usually into a CSV file.
You may want to export data:
| • | To use it in other programs. |
| • | As a means of making bulk changes in Microsoft Excel, and then reimporting the data back into Accelerus. |
This is a commonly used method of updating data across cycles where it is very similar but needs some modification. For example, all of the assessment items used in semester 1 may have a Sem1 tag attached to them. If the assessment items are basically the same in semester 2, all of the tags need to be changed to Sem2. Using features such as Fill down in Excel makes the changing of the tags very easy. Other changes to assessment item descriptions or other aspects could be undertaken in Excel in bulk also. The CSV file can then be imported, populating the semester 2 subjects.
The same type of records that may be imported in a CSV file can be exported out, with the exception of results data. The format of the CSV file for each of the entity types is the same when exported as it needs to be when imported into Accelerus. The exceptions to this are the cohort and class exports where an additional field is found for the number of students enrolled in each group or class.
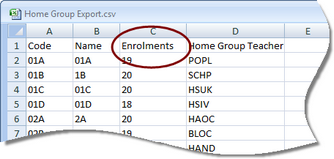
Most of the export processes are undertaken from the Export CSV Files window accessed via File > Export > CSV Files.
In addition, you may also export the following, using other methods in Accelerus:

|
Schools in the Victorian State and Catholic sectors setting up AusVELS reports also have the following export processes available to them, required for their AusVELS processes:
|
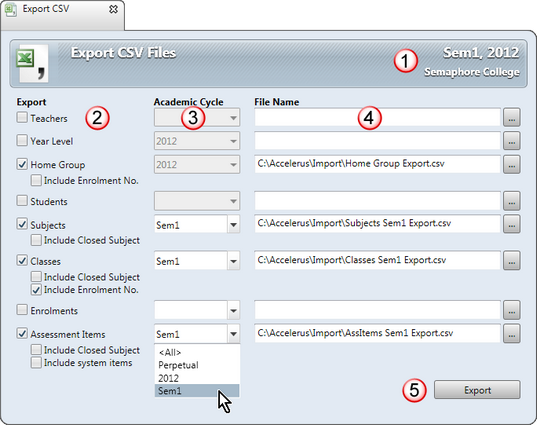
The main features and sections of the Export CSV Files window are outlined here.
#
|
Feature
|
1
|
The academic cycles from which data is being exported are displayed in the top right of the title bar. It is important that the correct cycles have been selected in the Academic Cycle Selector before you open the Export CSV Files window, in order to ensure you are exporting the correct cycles' data.
|
2
|
A checkbox appears for each entity type that may be exported out of the database. You select the types of data you wish to export, with as many files being exported at the one time as you wish.
In the case of cohort entities, there will be a checkbox for each type that has been defined in the School Settings window, eg one for Year Level and one for Home Group.
Many of the entities have further checkboxes to determine the inclusions in the CSV files:
| • | Include Enrolment No. exports a column which has a count of the number of students enrolled in the particular entity, eg the number of students in each class. |
| • | Include Closed Subjects will include records belonging to closed subjects in the export file, ie subjects which are not able to be edited and have been hidden from teachers and most selection processes. |
| • | Include system items applies to assessment items that have been created automatically from the Quick Setup window and only applies to schools in the Victorian Catholic and Government sectors, in relation to their AusVELS reports. |
|
3
|
The Academic Cycle field:
| • | Does not apply to teachers or students as their records are perpetual. However, they will be exported with the cohort and custom properties applicable at the currently selected academic cycles. |
| • | Must be selected for subjects, classes and assessment items. These could potentially belong to any of the cycles currently available, in the above case Sem1 or 2012. Therefore, you must either select a particular cycle or <All> from dropdown list. |
|
4
|
The location and name of the file into which you want the data for each selected entity is either entered manually, or you may click the Browse icon at the end of the Filename field to select the location and assign a name.
|
5
|
Clicking the Export button will export the data for the selected entity types into CSV files.
|
|
To export data into CSV files from Accelerus:
| • | Go File > Export > CSV Files to open the Export CSV Files window. |
| • | For each type of entity that you want to export: |
| ➢ | Click the appropriate checkbox. |
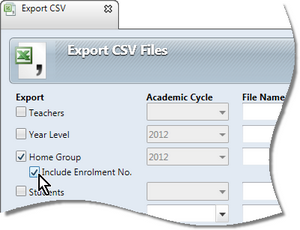
| ➢ | If the entity type has optional inclusion checkboxes, check those required. |
For example, below the Include Enrolment No box has been checked so that a column that shows the number of students enrolled in each home group will be included in the CSV file.
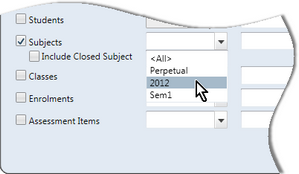
| ➢ | If exporting subjects, classes, enrolments or assessment items, select the academic cycle of the records you want to export, or select <All>. |
| ® | Enter the location and assign a name to the CSV file that will hold the exported data. |
OR
| ® | Click the Browse button to bring up a Save window in which you select the required location and assign a name to the file. |

OR
| ® | Accept the default file name, if displayed, this being the last exported CSV file for the record type. |
| • | Repeat for all other types of data that you want to export. |
| • | Click the Export button when ready to proceed. |
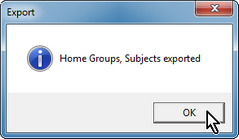
| • | Click OK at the completion message. |
| • | You may now open the CSV files in a text editor or in Excel and work on them. |
|


