The coding systems you use in your Accelerus database are important as codes uniquely identify the records in the database.
Codes also have other uses in that they allow like records to be easily group together, for purposes of identification, easier set up and analysis of results data, etc.
Consistent, logical coding systems for all of the database entities is good database practice.
There may be times where codes need to be changed:
| • | At the individual level, eg a teacher changes their name and, as a result, their teacher code changes also. |
| • | Where codes have not been set up as well as they could have been. |
| • | Where a school is changing the way it is structuring its cycles and, as a result, its subjects and classes need to be recoded. |
At the individual level, codes are changed directly in the applicable record, eg in the Teacher window for the particular teacher.
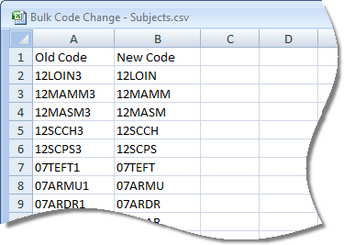
However, where codes need to be changed more extensively, the Bulk Code Change window may be used, accessed from the Tools menu. It allows a CSV file containing the changed codes to be imported to update records in bulk.
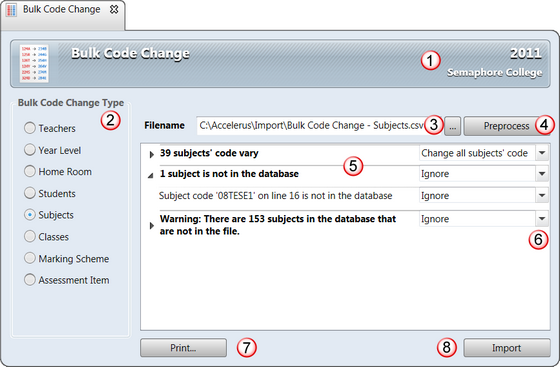
The Bulk Code Change window contains many of the features of the Import CSV Files window:
# |
Feature |
|---|---|
1 |
Ensure that you are in the correct academic cycles when changing entity codes - check the top right corner of the title bar. Most of the data in Accelerus belongs to a particular academic cycle and you may change the codes for the wrong data if the wrong cycles are selected. If the wrong academic cycles are displayed, close the Bulk Code Change window, select the correct cycles in the Academic Cycle Selector and reopen the window. |
2 |
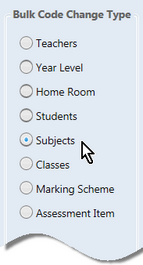
Only one type of entity may be updated at once, and an option button appears for each entity type that can be updated in bulk using this window. In the case of cohort entities, there will be a button for each type that has been defined in the School Settings window, eg one for Year Level and one for Home Group. |
3 |
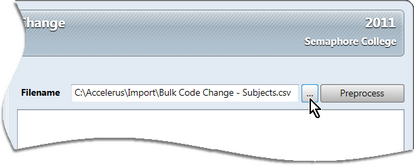
The path and name of the CSV file that contains the changed codes for the selected type is either entered manually, or you may click the Browse icon at the end of the Filename field to select it. |
4 |
The Preprocess button will run a process which compares the data in the CSV file with that in the database, and informs you of the impact of the code change on your database prior to actually committing the changes. Issues, errors and warnings are reported back, and displayed in the pane below. Corrections may be made to the CSV file being imported and the Preprocess button clicked again to refresh the listed issues. |
5 |
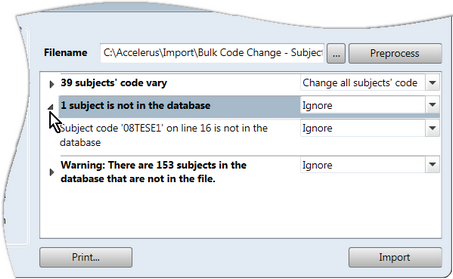
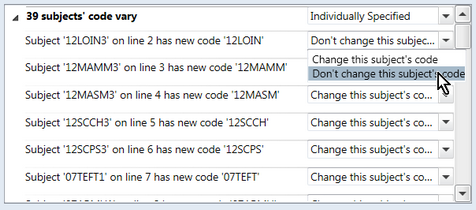
The Preprocess pane lists all of the issues, errors and warnings under broad types or headings, eg records that will have their codes changed, records not found in the database, etc. To begin with, only the issue headings are displayed. Users may double click a heading, or click the arrowhead to its left, to display the details of the records to which the issue applies. Double clicking again will hide the details. In many cases, the details for an issue do not need to be revealed, eg 39 subjects' codes vary, as shown above. These are the codes that will be changed successfully. However, in others it is very important that all of the issues are read carefully and the individual lines to which the issue pertains are checked thoroughly. By revealing the details of an issue, you may investigate further and take steps to remedy any problems, if necessary. If any issues are raised that you do not expect, it is recommended that you cancel out of the bulk update of codes and investigate these further. This may mean that you will need to make changes to the CSV file and then rerun the preprocess step. |
6 |
For each issue type, there is a dropdown action box. A default action will be displayed, eg Change all subjects' codes, or Ignore where no action can or needs to be taken. In most cases, alternative actions are available for selection from the dropdown list. You may also change the action for an individual record, when the details are displayed. In this case, the heading's action will automatically change to Individually Specified. |
7 |
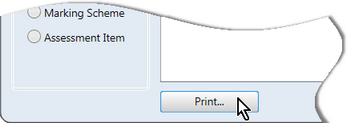
The Print button allows you to preview and print out a copy of all issues and selected details, if you need to investigate further. The printout will only include the individual details of the issue rows that are currently open. Where an issue is contracted, only the issue header will be printed and not its details. |
8 |
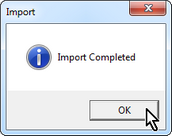
When all issues have been investigated and corrected, where necessary, clicking the Import button will import the CSV files into the database, changing the codes of the records nominated in the preprocess pane. |
| Entity coding systems |
In a school, the school's administration system is usually the main database and, from this, other databases extract their data such as timetable systems. Accelerus, in turn, has most of its data imported from these sources. Therefore, some, if not most, coding systems you use in Accelerus will be inherited from these other systems. For example, teachers and students are often extracted from the school's administration system where they will have been assigned a code. Other records may be coded through your timetable package, eg subject and class records. Accelerus relies on these being consistently and well-coded for its purposes. However, often the coding that has been set up in a school, eg in a timetable system, may not be extensive enough for a database such as Accelerus which will be the historical repository of all of the results stored at the school for all students. Accelerus data needs to be organised in a way that it can be maintained for the life of the database, not just for a report run. Every year you do not change teacher codes, for example, and in order for data from one cycle to be used as the basis for setting up others, there needs to be consistency. Further, Accelerus is not only used to assess the students and produce reports for the current report run. It is used to analyse the data, make comparisons across subjects, learning areas, years, etc. These comparisons and analyses cannot be made easily if there is no consistency. For example, how can all subjects in the Arts be extracted if there is nothing to easily identify them as belonging to the Arts? Therefore, when setting up Accelerus, you should spend time thinking about how best to code your records, particularly subjects, classes and assessment items.
|
Every entity has a code and every code may be changed if required. Accelerus will ensure that all of the related records in the database are automatically updated. For example, if you change the code of a teacher, all references to the teacher will be updated in all class, subjects, cohorts, etc, throughout the database. However, there are implications to changing some codes.
In this case, you should do all of your copying over with the old subject codes and then make changes to the codes.
They will need to be refreshed, the old fields deleted and the new reinserted.
The automatic assigning of the password based on the teacher's code only occurs when a teacher is first added to the database or when the database is first converted from MarkBook to Accelerus.
|
The Bulk Code Change window, accessed via the Tools menu, allows you to import a CSV file containing code changes for most entity types, eg students, teachers, subjects, etc.
|