The photos of students may be imported into the Accelerus database so that they may be visible to teachers when they are working on assessing their students.
The importing of photos is carried out via the Import Student Photo windows, found under File > Import > Student Photos.
The Import Student Photos window contains many of the features of the Import CSV File window, as well as other aspects particular to the importing of photos:
# |
Feature |
||||||
|---|---|---|---|---|---|---|---|
1 |
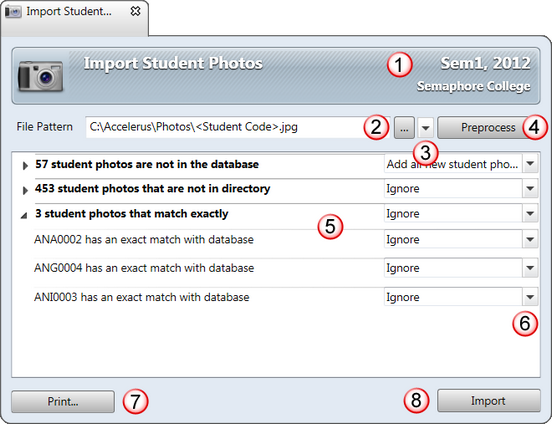
When importing photos, ensure that you are in the correct academic cycles - check the top right corner of the title bar. The implication of this when importing student photos is that the Import Student Photos window will only import photos for and report on current students. Therefore, if you are in the wrong cycles, students may miss out on having their photos imported. |
||||||
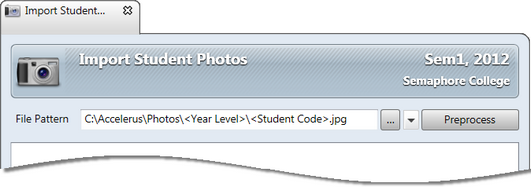
2 |
The File Pattern field stipulates the:
|
||||||
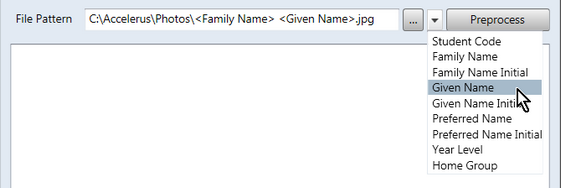
3 |
The dropdown arrow displays the list of student fields that may be inserted into the File Pattern field to match the way in which the student photos have been named at the school. As shown here, the Family Name and Given Name fields were chosen and they appear as placeholders in the File Pattern field.
|
||||||
4 |
The Preprocess button will run a process which compares the photos in the folder with the current students in the database. Details of this are displayed in the preprocess pane below. |
||||||
5 |
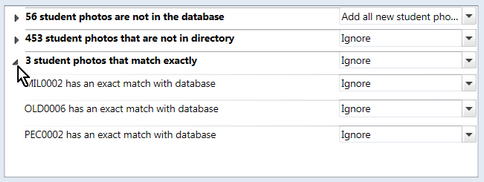
The Preprocess pane lists all of the issues it discovered in comparing the photo files in the folder and the database, eg students whose photos will be added or updated, which photos are missing, etc. To begin with, only the issue headings are displayed. Double click a heading, or click the arrowhead to its left, to display the details of the students to which the issue applies. Double clicking again will hide the details. |
||||||
6 |
For each issue type, there is a dropdown action box. A default action will be displayed, eg Add all new student photos, or Ignore where no action can or needs to be taken. In some circumstances, alternative actions are available for selection from the dropdown list. |
||||||
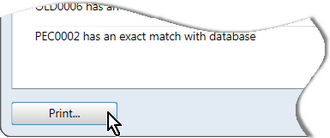
7 |
The Print button allows you to preview and print out a copy of all issues and selected details, for the photos being imported. This may be handy if quite a few photos were missing for students and you want to track them down. The printout will only include the individual details of the issue rows that are currently open. Where an issue is contracted, only the issue heading will be printed. |
||||||
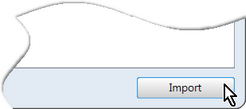
8 |
When all issues have been investigated and corrected, where necessary, clicking the Import button will import the photos into the database, updating the photos of those who already had one, and adding photots to those who don't. |

Certain protocols must be observed regarding the importing of student photos:
All photo files being imported in the one import process must be stored in the same base folder and follow the same file naming pattern. This must match one or a combination of the fields available in the dropdown list at the end of the File Pattern field. For example, the photos may be stored in a folder on the network, with each photo having the student’s code, or family name and given name initial, as its name. The fields may be used as subfolder names, as well as file names, allowing you to import photos from multiple folders in the one process. For example, if all of the photos were in a folder for each year level, ie 7, 8, 9 etc, <Year Level> may be used in the path, with backslashes placed appropriately to indicate subfolders, as shown here.
However, if the folders are not named using any of the available fields, you may perform multiple imports of photos if necessary.
Any common file format used for photographs may be used, eg .jpg, .png, .gif, etc, as long as all of the files in the one import process are of the same type. Photos can be of any size as the import process will convert them automatically to a manageable size so that the database does not become too large and that they may be downloaded to teachers' offline files.
Each photo import process replaces any pre-existing photo for the same student. Any student whose photo is missing is ignored, ie their old photo remains, if one exists already.
|
To import student photos:
The File Pattern will appear with the selected folder, and with <Student Code>.jpg appended by default, ie each photo has the code of the student as its name, and is of the type .jpg.
|
Once photos have been imported into Accelerus, they may be seen:
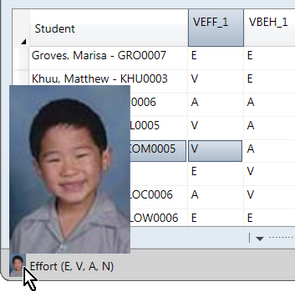
To begin with, a thumbnail photo of the student currently being assessed is displayed. Clicking the thumbnail in the status bar will enlarge it. Clicking it again will return it to a thumbnail.
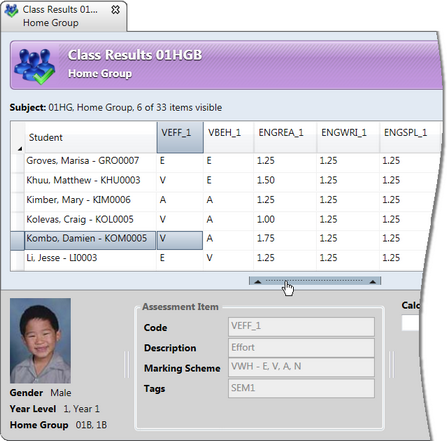
On the other hand, a teacher may display the optional panel at the bottom of the window to keep the photo displayed, as well as see full details about the assessment item. The panel is displayed and hidden by clicking the divider above the panel or status bar, as shown below.
|