Before teachers collect or receive their class files, a series of settings need to be set in the Accelerus database by the Accelerus administrator, in the School Settings window:
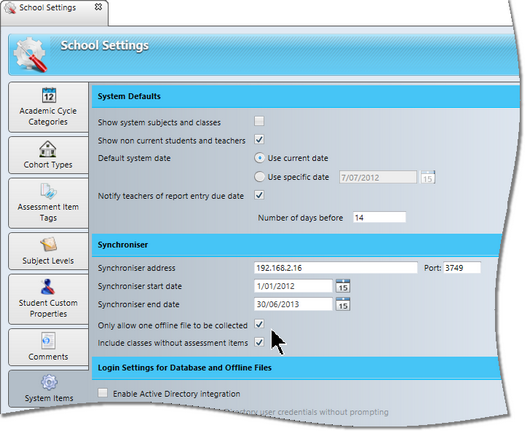
| • | In the System Defaults section, set the default system date, which should be a date that falls in the current academic cycles that teachers will be working on. |
The cycles in which the date falls will be selected by default in the Academic Cycle Selector. What is then displayed automatically in the Welcome Screen for anyone who logs into Accelerus, whether in an offline file or directly in the database, will be the classes that belong to these cycles. This date also applies to teachers using Accelerus Web.
The default system date may be:
| ➢ | Automatically set to use the current date. |
In this case, whatever date is set on the computer running Accelerus will be the default system date.
OR
| ➢ | A specified date may be entered, using any valid date format, or selected by clicking the calendar icon. |
Where the current date is used, it is not necessary to change the default date as cycles change, eg at the beginning of each semester or term.
| • | In the Synchroniser section: |
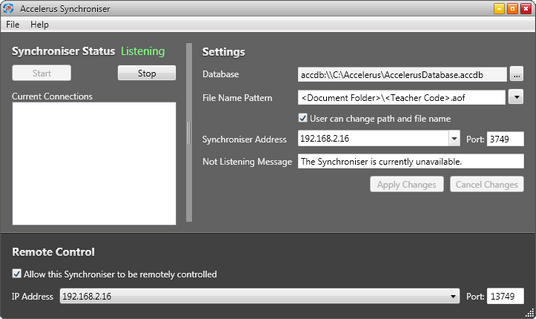
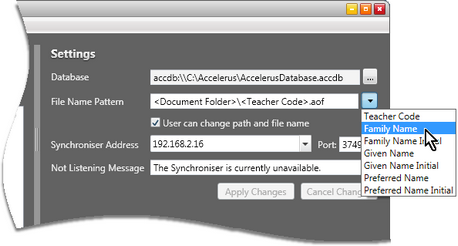
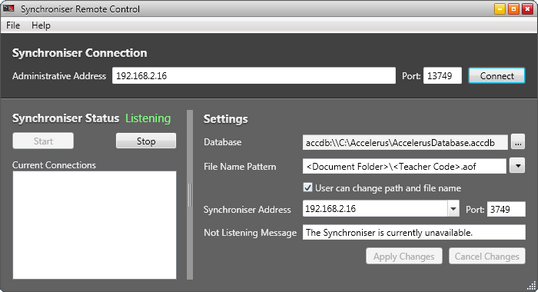
| ➢ | Enter the IP address of the Synchroniser computer and the port number to be used for the Synchroniser, as entered when setting up the Synchroniser. |
Note that the IP address and port number entered here are used by the export offline files process so that this information is stored in the created offline files, making it unnecessary for teachers to manually enter these details when logging in to their offline files.
| ➢ | The Synchroniser start and end date fields determine which cycles of data will be available to teachers in their offline files. Only cycles which fall within these dates will be available in the Academic Cycle Selector when teachers are working offline. |
For example, above, all cycles in 2012 will be displayed in the offline files, as the date range is 1 January to 31 December 2012.
The Synchroniser will automatically remove any classes from teachers that fall outside this range, eg the classes from 2011.

|
The Accelerus administrator must remember to change the default system date, and the Synchroniser date range fields each cycle in order that teachers synchronise and receive the correct files.
|
| ➢ | The first of the checkboxes - Only allow one offline file to be collected - should be checked if you do not want teachers to be able to keep collecting offline files. |
It applies whether teachers are collecting offline files via the Login window or, when logged directly into the Accelerus database, via the Welcome Screen.
It is highly recommended that this box is checked. Otherwise, the teacher may keep collecting a new offline file, rather than synchronising the one they have already collected.
| ➢ | The Include classes without assessment items checkbox should be checked if you want teachers to receive all classes in their offline file, whether they contain assessment items or not. |
This setting affects not only the collection of offline files but also their synchronisation. For example, if an offline file was exported that included classes without assessment items, but the checkbox was not ticked in the School Settings window, when the teacher next synchronised, any classes without items would be removed from the offline file.
|