Each analysis created in Accelerus will require its own set of steps in order to meet your needs. Each operator will need to have its exact parameters defined. However, the overall process of creating and setting up analyses is as follows:
| • | Create a new analysis tabbed window: |
| ➢ | From the File menu, select New > Analysis. |
OR
A new untitled analysis tabbed window will open, in which the Analysis Properties and Source operator appear.
| • | Set up the analysis properties: |
| ➢ | Insert a name for the analysis, up to 40 characters in length. |
| ➢ | Insert a full description of the analysis that will make it easy to identify it without having to open it. |

| ® | Enter a name for the parameter. |
| ® | From the dropdown list, select the parameter data type that must be entered by the person running the analysis. This may be a string, ie text, a number, date or file, although String is the most usual selection. |
| ® | Enter the prompt text that will appear when the analysis is run, prompting the user to enter the required data. |
| ® | Enter a default value for the parameter which will be used when the analysis is run from within the Analyser window and not from the Analyser Explorer. |
| ® | If you want to limit the user to specific values for the parameter, click the Browse button at the end of the Possible Values field. |
| ® | This will bring up an Edit Values box in which you enter each of the default values, one per line, pressing Enter at the end of each line and clicking OK when finished. |
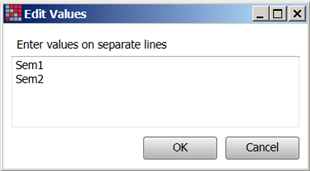
| NB | You must ensure that the default value is one of the possible values and that they have the same case. |
| ➢ | Click the Source operator in the Steps pane, to display its properties. |
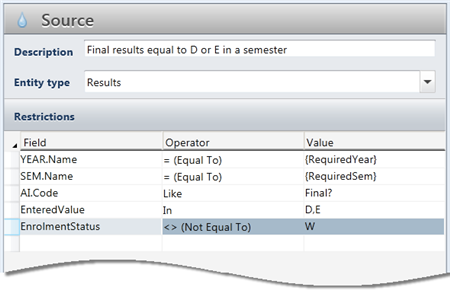
| ➢ | Enter a description of the data being extracted via the Source operator, eg Final results equal to D or E in a semester, as shown below. |
| ➢ | In the Source operator’s Restrictions table, enter each of the restrictions required in the next blank restriction row, as follows: |
| ® | Click the down-arrow in the Field column to reveal all of the fields in entity folders. Double click a folder or click the arrow head beside the folder name to reveal its fields, selecting the field required for the particular restriction. |
| ® | In the Operator column, type in or select the operator required from the dropdown list, keeping in mind the appropriateness of the operator for the type of data of the field. |
| ® | In the Value column, enter the value/s that the field is to be restricted to, ensuring you follow the required protocols for the Value column, including the insertion of braces, ie curly brackets, around parameters. |
| • | Save your analysis initially and regularly by clicking the Save icon or pressing Ctrl S. |
| • | Insert and set up the next operator: |
| ➢ | Insert the next required operator through which you want to flow the data, by clicking its icon in the Analyser toolbar, or selecting it from the Analyser menu. |
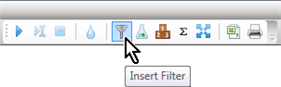
This may be an intermediary operator, eg Filter, Aggregate, etc, if you require the data to be manipulated, or the appropriate output operator – the Print or Export operator.
New operators will be inserted immediately after the operator that is currently displayed. Therefore, where more than the Source operator is currently displayed in the Steps pane, you should click the operator that the new operator is to follow, before clicking the appropriate Insert operator icon.
| ➢ | Click the newly-added operator to display its properties, if not already displayed. |
| ➢ | Set up the operator in a manner appropriate to the type of operator. |
| ➢ | Repeat the process of inserting and setting up operators, as required, ensuring you end with a Print or Export operator. |
| • | Make adjustments to the operators: |
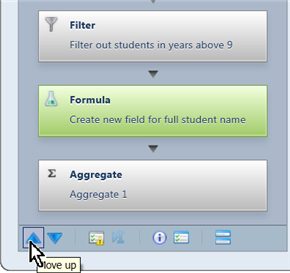
| ➢ | If an operator has been inserted in the wrong order, move it into position by clicking the Move up and Move down icons at the base of the Steps pane, until it is in the correct position. |
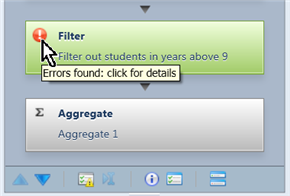
| ➢ | If an operator contains an error, indicated by the red exclamation mark in the Steps pane: |
| ® | Click the error symbol and a message box will appear, informing you of the reason for the invalidity of the operator. |
| ® | You must click open the invalid operator’s details and correct the error therein, before you can run the analysis. |
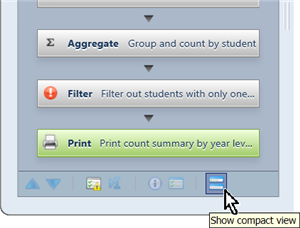
| ➢ | If all of the operators do not fit in the Steps pane, or you want to display them more compactly, click the Show compact view icon. |
| ➢ | Clicking this icon again will return the Steps pane to full view. |
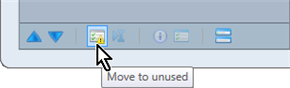
| ➢ | If you have inserted an operator in error or want to temporarily exclude it from the analysis: |
| ® | Click the operator in the Steps pane. |
| ® | Click the Move to unused icon at the bottom of the inserted operators. |
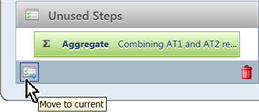
| ➢ | If not already showing, an Unused Steps pane will be displayed, and the operator will now appear there. |
| ➢ | To move an operator from the Unused Steps back to the Steps pane: |
| ® | Click the operator in the Steps pane after which you want the unused operator to be inserted. |
| ® | Click the unused operator, and then the Move to current icon. |
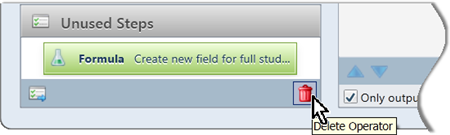
| ➢ | To delete an operator totally: |
| ® | Ensure it has been moved to the Unused Steps pane, as covered above. |
| ® | Click the unused operator you want to delete. |
| ® | Click the Delete operator icon and the operator will disappear immediately. |
It cannot be reinstated and on saving the analysis, it will be deleted permanently.
| ➢ | When you have set up the analysis, with at least a Source and output operator, you may run the analysis in any of the following ways: |
| ® | Select Run from the Analyser menu. |
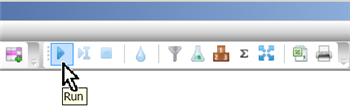
The run process will step through each of the operators, and display progress – the number of records processed and found by each operator – as it does so.
| ➢ | If run successfully, the data will: |
| ® | Appear in a new tabbed window in the case of a Print operator. From here it may be viewed and printed. |
| ® | Be output to a .txt or .csv file if the output operator is an Export operator. This file may then be opened with Microsoft Excel or a text editor such as Notepad. |
| ➢ | To stop an analysis before it finishes running, click the Stop icon in the Analyser toolbar or menu. |
| • | Fix and rerun the analysis: |
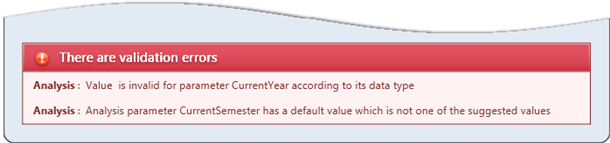
| ➢ | If validation errors occur during the running of the analysis, an error message will appear across the bottom of the Analyser window, informing you of the operator/s containing the errors, eg the Source operator, as shown below. You must fix these errors. |
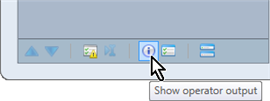
| ➢ | In the process of fixing errors or tracking down the cause of unexpected results from an analysis, view the data that has been output from each operator by: |
| ® | Clicking the arrow head between the operator in question and the next operator. |
OR
| ® | Clicking the operator in the Steps pane and then clicking the Show operator output icon. |
| ➢ | If, as a result of the analysis output, you want to make changes to any of the operators: |
| ® | Click the appropriate operator and make the necessary amendments. |
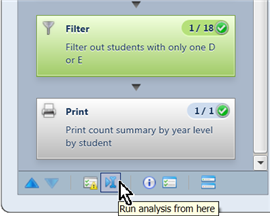
| ® | If the changes were made in an operator downstream from the Source operator, it is not necessary to rerun the analysis from the beginning. Instead, click the first operator that has had changes made to it and then click the Run analysis from here icon. |
You may select this option from the icons at the bottom of the Steps pane, the Analyser menu or toolbar.
| ➢ | Save the analysis by clicking the Save icon or pressing Ctrl S. |
| ➢ | Close the tabbed window of the analysis, which will now appear in the Analysis Explorer and Quick Find, from where it may be reopened. |