Adding and Updating

Accelerus Icon
 

When in an individual subject's window you may:

Add Assessment items to the subject in its Assessment Items table.
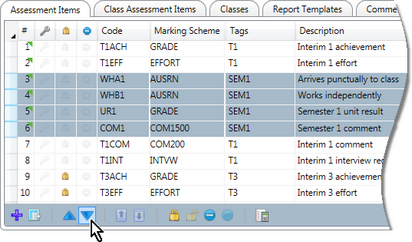
Modify existing items in this table, including changing the values of fields, adding calculations, changing the order of items, locking items and/or restricting them from view.
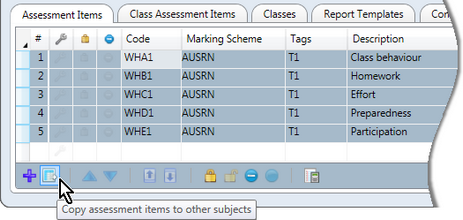
Copy the subject's assessment items to other subjects or even back into the subject itself, to create a duplicate set.
Delete assessment items from the subject.

However, some of these operations are able to be performed in bulk, in the Assessment Item Explorer, via importing of assessment item CSV files, or the Bulk Code Change window.


Lightbulb

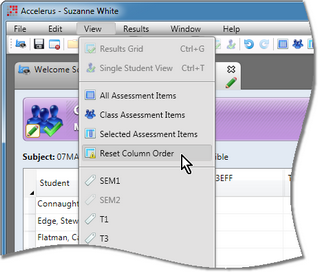
When working on assessment items in a subject, hide the subject's details to allow more assessment items to be displayed. Do this by clicking the arrow icon beside Subject Details label in the top section of the subject window.


minusAdding assessment items to a subject
Before adding assessment items, ensure that:
The marking schemes used in assessment items have already been created.
The assessment item tags have been added.
You have devised a coding scheme for your school's assessment items.
Find the subject record required, using the normal selection procedures, via:
The Subject Explorer window

OR

AI AddStep0

Open the subject in one of the following ways:
Double click the subject's row to open it in its own tabbed window.

OR

Right click the subject and select the Open details option.

OR

Highlight it and click its Open details icon, in the bottom left-hand corner.
Click the subject's Assessment item tab.
Click the New assessment item icon.

AI AddStep1

OR

Right click and select New assessment item from the menu.

OR

Double click in the Code cell of the first blank row.

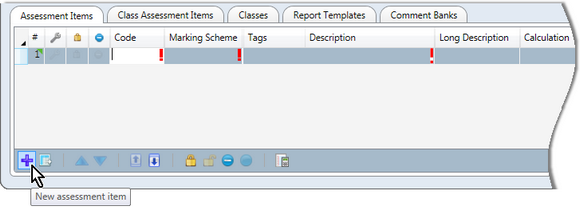
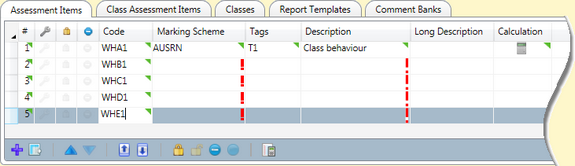
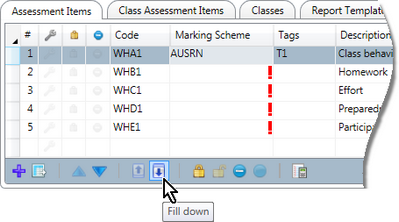
In all cases, a new row will be added to the Assessment Item tab. It will be assigned the next ordinal value, with the cursor positioned in the Code cell, and red exclamation marks in the three mandatory fields, as shown above.

Enter the assessment item code in the Code cell, ensuring that you use a consistent coding system.

You may use alphanumerics, underscore, hyphen and apostrophe in the code field.

It is recommended that you use capitals for all codes.
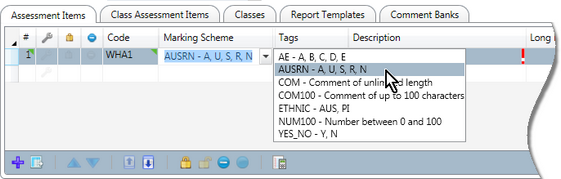
Tab to the Marking Scheme cell and:
Click in the cell to display a dropdown arrow which allows you to choose the marking scheme from a list.

AI AddStep2

OR

Begin typing the code of the scheme to have any matching schemes selected automatically.

For example, in the above case, if A is typed the AE scheme will be selected but, if AU is entered, AUSRN will be selected, the one required.
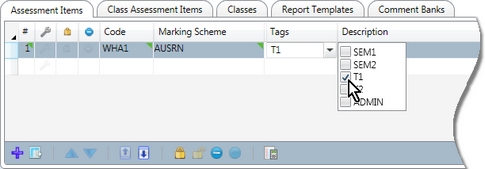
 

Lightbulb

If you are not sure of the exact details of the marking scheme required, or think you need to add a new marking scheme, you may click the Explore all available marking schemes icon in the toolbar to bring up the Marking Scheme Explorer. From here you may view, open and add new marking schemes.


Tab to the Tags field and:
Type in the assessment item tag that you require, if any.

OR

Click in the cell to display a dropdown arrow which, if clicked, will display all of the available tags. Click the checkboxes of the tags required.

AI AddStep3

If multiple tags are selected, ensure you understand the implications of so doing.

Tab to the Description field and enter a description of the assessment, up to 150 characters in length.

This is displayed to teachers when they are entering results for the assessment item and may also be printed in reports.

Only enter a long description if the 150 characters in the description field is insufficient or if a different description is required on reports to the one in the Description cell.

In this case, a shorter description for teachers' benefit is entered in the description field and the full text is entered in the long description field which has no character limit.

If a calculation is required in the assessment item, double click the Calculation cell to bring up a Calculation Editor window in which you select the type of calculation and enter the formula required.

Where a calculation has been entered a calculator icon will appear.

AI AddStep4

Lightbulb

Press F1 when in the Calculation Editor to find full details of entering calculations in assessment items.


If the new assessment item needs to be locked so that teachers are not able to enter results in it, click the Lock assessment item icon.

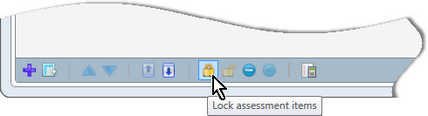
Note, however, that assessment items may be locked in bulk in the subject, as well as across subjects in the Assessment Item Explorer. Therefore, unless the particular item needs to be locked for a specific reason, it would be more efficient to lock multiple assessment items in the one process once all of the assessment items have been added.

AI AddStep5

If you need to restrict the particular assessment item, with its row highlighted, click the Restrict in teacher's view icon.

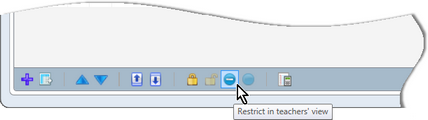
Again, assessment items may be restricted in bulk. However, there may be reasons for restricting a particular assessment item, eg it is to hold the number of days absent and this data is to be imported from the school's administration system. Therefore, it never needs to be visible, and it is only one of a few items needing to be restricted.

AI AddSte6

Tab to the next row or double click in the Code cell of the next row to add another assessment item, following the same instructions as above.
Click the Save icon or press Ctrl S to save the subject record and its newly added assessment items.


Lightbulb

Try this timesaving method of adding a series of similar assessment items:

Enter the first assessment item row.
Enter the code of the next item.
Press the down arrow on your keyboard to move to the Code cell of the next row.
Enter the next code.
Continue in this way until all codes of the series of items have been added.

AI StepsQuick

Click in the marking scheme cell of the first item and click the Fill down icon or press Ctrl D to copy the marking scheme to all rows below.
Do the same in the tags cell.
Enter the required description for each of the rows.


minusModifying a subject's assessment items

Assessment items may be changed in their subject's record. All of their fields may be changed, although the implications of so doing need to be understood, especially when changing the code of an assessment item.

Note that an assessment item belongs only to the subject in which it exists and any changes made to the item affect the subject only, even if an assessment with the same name exists in other subjects. However, there are procedures whereby changes in an assessment item may be copied to other assessment items with the same code in other subjects.

In addition, the order of the assessment items may be changed.

This section deals with some of the tools and issues around changing assessment items in individual subjects.


The first column in the Assessment Items tab is the ordinal value of the assessment item. This is assigned automatically as you add assessment items.

This is the order that the assessment items will appear in a class or subject results window when first opened by a teacher.

If a teacher changes the order of the columns in their class results window, the order chosen by the teacher then takes precedence over the order found in the subject.

However, at any time, teachers may return the assessment items in their class back to the original order as set in the subject's assessment item table. They do this via View > Reset Column Order.

AI ResetOrderMenu

The order of the assessment items may also be changed in the subject, eg if added out of order, or new items were added late.

To change the order of assessment items in a subject:

Select an individual assessment item row.

OR

To select multiple individual rows, hold down the Ctrl key while clicking rows.

OR

To select a contiguous set of rows, click the first row and, while holding down the Shift key, click the last of the rows required.
Until positioned in the correct order:
Click the appropriate one of the Move up or Move down icons.

OR

Press Ctrl á of Ctrl â.

AI MoveUpDown

The ordinal values will change automatically as you move the rows up and down.

Save by clicking the Save icon or pressing Ctrl S.


The contents of one cell in any of the columns in the Assessment Items table may be filled down or up, ie copied down or up to all of the rows below or above, respectively.

This is handy in several situations:

Where a series of assessment items are to have the same prefix but a different suffix is to be added to each, eg BEHAV1, BEHAV2, BEHAV3, etc. BEHAV could be filled down and each row need only have the suffix added.
Where a series of assessment items are to use the same marking scheme or tags.
Where a generic description is to be added to all items as the descriptions are to be changed by subject coordinators.


To copy the contents of a cell:

Click in the cell containing the value to be filled up or down.
Click the appropriate one of the Fill up or Fill down icons.

OR

Press Ctrl U or Ctrl D respectively.

AI FillDown

Save by clicking the Save icon or pressing Ctrl S.


Warning

Be careful that you do not accidentally fill up or fill down where you want to keep existing data, as there is no Undo function available. You will have to close the subject, lose the changes and restart.


Often a change that has been made to an assessment item in one subject needs to be replicated in many other subjects. For example, a comment item's marking scheme may be changed so that more characters are allowed. The change would be made in the appropriate subject's comment assessment item. If the same coded assessment item needs to be changed in other subjects, this one item may be copied to selected other subjects, replacing the originals with the changed item.

This is done via the Copy assessment items in the Assessment Items tab's toolbar. The full procedures for copying assessment items from one subject to other subjects or even within the same subject, including copying to replace existing items, is covered in the Copying and Replacing section.

AI CopyIcon


minusDeleting assessments items

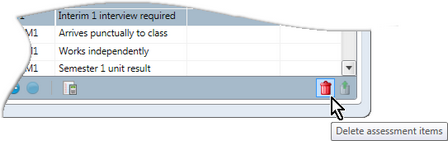
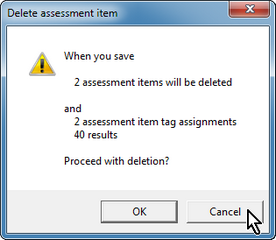
Assessment items should only be deleted if they have been entered by mistake and have never been used for assessment purposes. For example, all of the assessment items from one cycle have been copied to the next but in the new cycle, certain items are not required. These can be deleted.

Where a set of assessment items needs to be deleted in bulk from multiple subjects, you should use the Assessment Item Explorer.

Otherwise, to delete items from individual subjects:

Select an individual assessment item row in the subject.

OR

To select multiple individual rows, hold down the Ctrl key while clicking rows.

OR

To select a contiguous set of rows, click the first row and, while holding down the Shift key, click the last of the rows required.
Click the Delete assessment items icon.

AI DeleteIcon

OR

Right click and select the Delete assessment items option.
A message will be displayed, informing you of the extent of the deletion which you should read carefully, especially if it informs you that results will be deleted.

AI DeleteMsg

Click Cancel to abort.

OR

Click OK, and the selected records will be marked for deletion, with a red line appearing through them.
You may then either:
Remove the deletion flag from the records by clicking the Reinstate icon.

OR

Click the Save icon or press Ctrl S to save the subject, deleting the assessment items and any results permanently.


Warning

Be aware that, if teachers are working in offline files, that you may be deleting assessment items for which the teachers have entered results, but that these are not yet in the database. When the teacher synchronises their offline, they will receive messages about the deleted assessment items and any results added since the teacher last synchronised will appear in the Result Conflict Explorer.