The Export operator is one of the two available output operators, the other being the Print operator. One of these two operators must be at the end of every analysis.
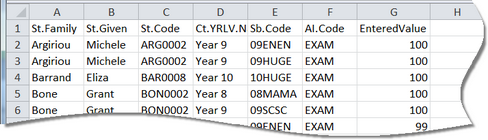
The Export operator allows you to output the data extracted by your analysis to either a comma delimited (.csv) or tab delimited (.txt) file. The output, an example of which is shown here, opened in Microsoft Excel, will have one line of data for each record extracted by the analysis.
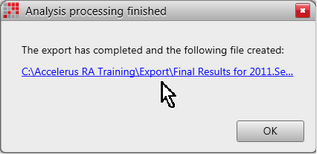
On running an analysis which ends in an Export operator, when completed, you may click the link in the Analysis processing finished box to go directly to the exported file.
It will generally open in Microsoft Excel by default, depending on what settings you have on your computer. Otherwise, you may open the file via Windows Explorer or My Computer in any text editor, eg Notepad, or in Microsoft Excel.
# |
Feature |
|---|---|
1 |
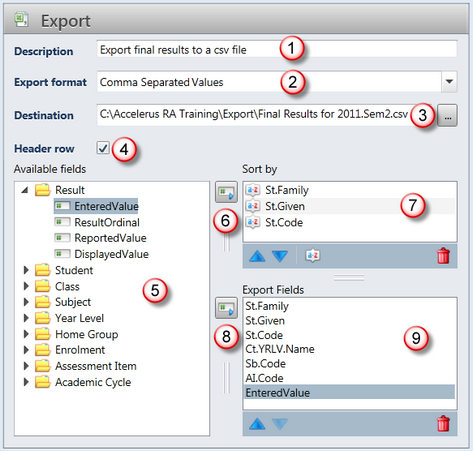
Enter a description of the functionality of the particular export operator. This is what will appear in the Export operator box in the Steps pane. |
2 |
Select to export the data to a comma separated values file (CSV) or a tab separated values file (TXT). |
3 |
You nominate the destination path and name of the file that will contain the exported data. Clicking the Browse icon at the end of the Destination field allows you to select the folder in which you want to store the file and to assign a name to it. |
4 |
Check the header row box if you want column headings to be inserted as the first or header row of the export file. The column headings will be the field names you insert in the Export Fields pane, eg St.Family, St.Given, etc. |
5 |
The Available fields pane contains the fields that may be selected and inserted into the Sort by and Export Fields panes on the right. The fields that are available will depend on the data coming into the Export operator from the upstream operators. |
6 |
Clicking the icon between the Available fields and Sort by panes inserts the currently highlighted field into the Sort by pane. Double clicking the field, when the Sort by pane has focus also inserts the field therein. |
7 |
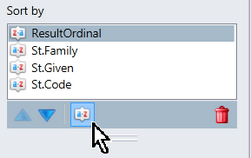
You may insert multiple fields in this section, one under the other, with the primary sort mode being the uppermost field, the secondary sort mode, the second field and so forth. In the example shown here, the exported records are to be sorted firstly by the ordinal value of the result, then the student’s family name, given name, and code. You may move the sort fields up and down into the correct order by clicking the Move up and Move down arrows. In the student fields, the sort mode is ascending, ie A to Z, but in descending order, ie Z to A in the case of the ResultOrdinal field. You may change the sort order of any field by clicking the Sort order button, as well as deleting a field by clicking the Delete icon. |
8 |
Clicking the icon between the Available fields and Export fields panes inserts the currently highlighted field into the Export fields pane. Double clicking the field, when the Export Fields pane has focus also inserts the field therein. |
9 |
In this example, seven fields of data will be exported for each record extracted. The order of the fields in the Export Fields is the order that the columns, or fields, fields appear in the export file. Change the order of the fields by clicking the Move up or Move down icons. Fields may removed by clicking the Delete icon. |
 The Sort by section is where you insert the fields by which you want your exported data to be sorted.
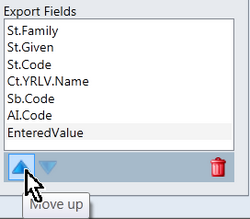 The Export Fields pane is where you insert the fields to be included in the exported data file.