Comment Bank Tools

Accelerus Icon
 

When you are working on or with comment banks, several tools are available to you, including the ability to run a spelling and punctuation check on the comments therein, find and replace text, and print out a comment bank listing.

Com FindReplaceIcon

In each case, you must first open the comment bank, using one of the standard open comment bank methods.


minusSpell checking comment banks

The spell check operation in Accelerus includes both a spelling and punctuation check. The later ensures that the most common punctuation errors are notified, including where sentences do not end with a full stop, where blank lines have been entered into a comment, and so forth.

To run a spelling and punctuation check:
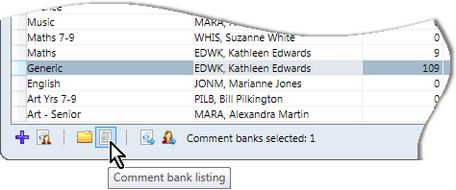
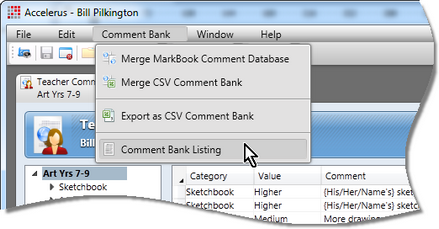
Open the comment bank, if not already open.
Click the name of the comment bank in the Category/Value pane if you want to check the whole comment bank.

OR

Click just the category of comments to be checked.

OR

Click just the value of a particular category.
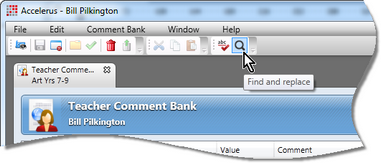
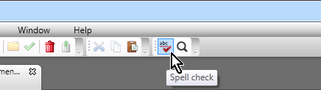
Click the Spell check icon or press F7.

Com SpellCheckIcon

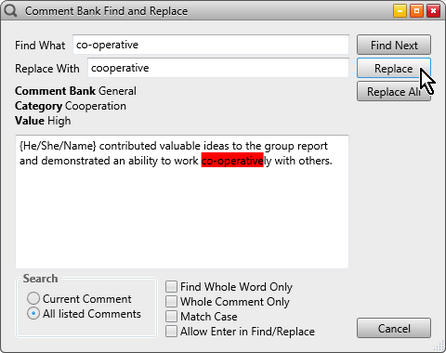
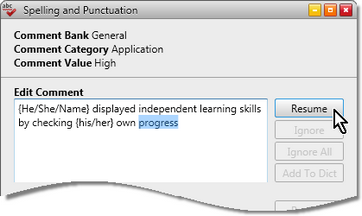
If any potential spelling or punctuation errors are found, the window below will be displayed, with information about the particular comment in which the error was found - its comment bank name, category and value - as well as the text of the comment.
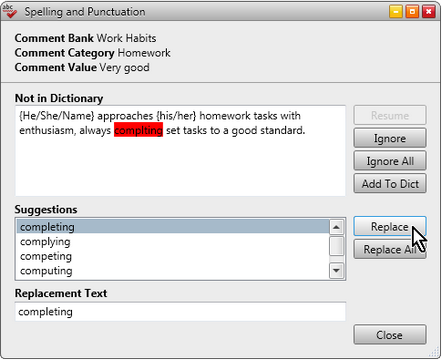
Com SpellCheck

When a potential spelling error appears, as shown above, you may:
Select from the suggested replacement words or enter alternative text in the Replacement Text box.

Then, click Replace or Replace All, the latter replacing all instances of the found text during the particular spell check operation. However, this is not a permanent replacement and, if the error is found again later, it will come up again as a misspelt word.

Click the Ignore button to leave the error as it is, for this instance only.
Click Ignore All which will not bring up the found text again during the current spell check operation. It will reappear, however, if you rerun a spell check in the comment bank.
The Add to Dict button will put the word into your dictionary and it will not appear as a spelling error again.
Click in the box displaying the found comment and edit the comment, as you see fit.

In this case, all of the buttons become disabled, except for Resume which you click once you have completed editing the comment.

Com SpellCheckEdit

When a possible punctuation error occurs, the bottom section of the Spelling and Punctuation window will indicate the problem found, eg Comment does not finish with punctuation, as shown below. The window will also suggest the solution, eg Add full stop.

Com SpellCheckPunctError

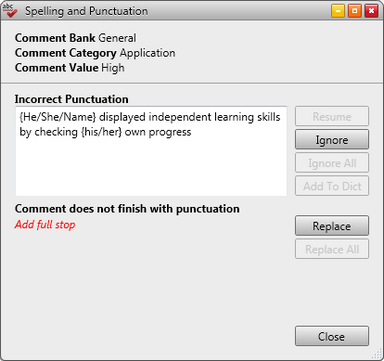
With such errors, you may:

Click Ignore to leave the error in the particular comment as it is.
Click Replace for the suggested solution to be applied.
Click in the box displaying the found comment and edit the comment, as you see fit.


minusFind and replace text in comment banks

You may search through the comments in a comment bank for particular text and, optionally, replace this with other text:

Open the comment bank, if not already open.
Click the Find and Replace icon, or press Ctrl F.

Com FindReplaceIcon

In the window that appears:
Enter the text that you wish to find in the Find What field.
If required, enter the replacement text.


Warning

If you want to find where an Enter has been inserted in a comment, you must tick the Allow Enter in Find/Replace check box at the bottom of the window first, before typing the text and/or inserting an Enter in the Find What field.

The same applies if you want to include an Enter in the replacement text.


By default the search scope will be set to All listed Comments, but you may select just the current comment, if required.

Com FindReplace

Make your selections in the checkboxes at the bottom of the window:
®Find Whole Word Only will only find instances of the text where a whole word matches with the text. In the example above, co-operative is found, but co-operatively would not be found as the whole word does not match the entered text.
®Whole Comment Only will only bring up comments which match fully with the text in the Find What field.
®Match Case will only bring up exact matches of upper and lower case characters. In the example above, for instance, Co-operative will not be found as the Match Case box is not checked.
®Allow Enter in Find/Replace allows the Enter key to be pressed in either the Find What or Replace With fields, when you wish to search for extra lines in comments, or insert an enter in the replacement text.
Click the Find Next button to start the search.
Where matches are found, these will be displayed, with the found text highlighted. In such cases you may:
®Click the Find Next button to ignore this instance and move to the next.
®Click the Replace button to replace the highlighted text with the contents of the Replace With field.
®Click Replace All to automatically replace all instances of the found text.
®Click in the comment box and manually edit the comment therein, usually followed by clicking the Find Next button.
®Cancel to stop searching for text, noting that if you do so, any replacements made up until this point will still remain in force.


minusPrinting comment bank listing

Any comment bank that you have access to, even if a school comment bank that is not owned by you, may be printed out.

There are two ways that you may print a comment bank:

From the Comment Bank Explorer:
Highlight the comment bank you want to print out.
Click the Comment bank listing icon.

Com ExplorerPrintIcon

OR

When the comment bank is opened, go to the Comment Bank menu and select Comment Bank Listing.

Com PrintListingMenu

The comment bank will be displayed in a preview window, as shown here.

Com PrintListingWindow


The Print Preview window has many features that facilitate the previewing, printing and exporting of listings.

Ent DataListingsPreview


#

Feature

1

The Table of Contents groups the records found in the listing. In some cases, these groups may be opened further to reveal sub-groupings or records.

Click the required record or group to be taken directly to its page in the listing. You may hide the Table of Contents by clicking its icon in the toolbar.

2

You may toggle between Table of Contents and Thumbnail view, the latter allowing you to see and scroll through thumbnails versions of the pages of the report. Clicking on a page's thumbnail takes you directly to that page of the report.

3

The Preview window's toolbar contains a wide range of icons allowing you to control the look of the listing in the preview window, as well as to print or export the listing to a file.

4

The listing is shown in the Print Preview window. Most of the icons in the toolbar control the look of the listing in the window, eg you may zoom in or out, to see more or less of the listing, control how many pages are shown at once, etc.


The toolbar in the Print Preview window contains a wide range of features.

Ent DataListingsPreviewToolbar


#

Feature

1

The Export icon allows you to export the listing to a PDF document, an Excel worksheet or a CSV file. When you select this icon, choose the file format from the Save as type field in the Export window.

Ent DataListingsExport

2

The Table of Contents icon allows you to show or hide the table of contents and thumbnails pane in the Preview window.

3

Clicking the Print icon brings up a Print box from which you choose the printer, number of copies, and other printer preferences.

4

You may search for text in the listing by clicking the Find icon. The Find window contains options to match the case and whole word, and to search up or down.

5

Click the Single Page View icon to display the listing in the Print Preview window one page at a time.

6

Click the dropdown arrow for the Multiple Page View icon to display from 1 up to 6 pages of the listing at a time. Highlight the number of pages and their configuration, eg 2 pages across or under each other.

7

Click the Continuous Scroll icon to scroll through the pages of the listing continually, rather than at a single page or multiple pages at a time.

8

Click the Zoom In and Zoom Out icons to see more details or to preview the overall look of the listing, as required, with each click displaying less or more of the listing, as appropriate.

9

Select the required zoom size of the Print Preview window by clicking the Zoom Value icon's dropdown list. You may select from preset percentages, page width and whole page view.

10

You may move through the pages of the listing by clicking Previous Page and Next Page icons.

11

The Page Index box displays the current page's number and the total pages, eg 1/2. Enter a page number and press Enter to move directly to that page.

12

The Backward and Forward icons allow you to go through previously viewed pages, in the same way as you would use Back and Forward in a web browser.

13

To use annotations in the listing:

Click the Annotations dropdown list, selecting the type of annotation you wish to add.

Ent DataListingsTextAnnottion

Drag the annotation to the location required, and release.
You may change the properties of an annotation, including adding text to it, by right clicking and selecting Properties.

Ent DataListingsAnnotationsProperties